Posting Photos With Your Messages / Using HTML in Your
Messages
Posting Photos
Adding photos to your posting is a good idea. It requires a little
more advanced Internet concepts than you learn from just doing simple
Web browsing. But none of the steps required to post an image on
Chronocentric are unique to Chronocentric--they are required to do
the same thing on most similar Web-based discussion forums or when
creating your own Web pages.
Step 1: Put Your Photos On The Internet
Included photos must be ones already uploaded to the
Web--Chronocentric does not provide image hosting or a way to upload
photos from your computer to the forums. Many Internet access
accounts provide basic hosting or 'personal web space' that you can
use for this. Alternatively, there are free services that, with some
restrictions, will allow you to do this, too.
If you don't know how to upload images to the web, take some time
and learn, a simple web search for image
hosting should get you to the info you need.
Sorry, but we at Chronocentric are not able to take the time to
individually teach people the standard Internet concepts needed, such
as FTP, image hosting and cutting and pasting URLs. In addition,
there is no way we can provide support or instructions for numerous
image hosting service or free/included Web space you might have
access to. So you need to use the instructions and support contacts
from those vendors to obtain help with their services.
Step 2: Find the Internet URL Of Your Uploaded Photo
The URL of an image must start with http:// and end with an
image file extension like .gif, .jpg, .jpeg or
any other common Interent image format. For example,
http://mydomain.com/images/photo.jpg.
If the URL you are trying to use ends with .htm, .html or similar,
then it is NOT right. Those are addresses for a Web page, not a
specific photo -- the URL must point directly to an image file and
not merely a Web page that contains the image.
With many web browsers, you can right-click on an image and
select Properties from the pop-up menu to let you see the Internet
URL that points direct to the image.
You cannot point to an image file on your local computer. The
image must already be uploaded to a location on the
Internet.
Step 3: Put The URL Of Your Uploaded Photo In The Posting
Form
The posting form includes a place to paste a URL to a photo to
display in the posting. Be careful when pasting URLs that you don't
accidentally repeat the http:// as http://http:// or it
won't display the image.
Advanced Trick: Multiple Photos In A Single Posting
To post multiple photos, you can use standard HTML image tags in
your message. You can do this instead of or in addition to the
technique described above for posting a single image. In our discussion forums, rather than using standard HTML codes, you can use the [img] code to post photos. You simply put [img] before the address for each photo, and you put [/img] after the address for each photo. When a browser sees these codes, it knows that the file in between them shoudl be displayed as a photo.
For example, the following code will insert three photos into your message:
[img]http://mydomain.com/images/photo1.jpg[/img]
[img]http://mydomain.com/images/photo2.jpg[/img]
[img]http://mydomain.com/images/photo3.jpg[/img]
At the end of the address for each of these photo, be sure to insert the [/img] code.
Using HTML and Photos in Your Messages
Lesson One --
HTML Basics
Hi Guys,
presented here is the first of my "tutorials" on how to use HTML
in your posts on the Zowie Omega Forum.
This tutorial will cover how to spice up your text a bit. To do
this you'll need to use to basic HTML commands.
HTML is not just something that only "Computer Geeks" can use.
Anyone can do it. Housewives, pensioners, watch collectors, anyone
!
**************************************************************************************
So what do you want to do with your
text ?
- Make something Bold
?
You have to simply put
<B> before the text
& </B> after the
text ( if you don't "close" the command.. ALL subsequent text will be
Bold. )
eg
I like <B>Omegas</B>
-> I like
Omegas
Simple Eh !
- Underline is done with
<U> ... </U>
- Italics is done with
<I> ... </I>
- Crossed out is done
with <S> ... </S>
**************************************************************************************
- You
want to change the colour of your text ? eg make it blue ?
simply put <FONT
COLOR="BLUE"> before your text
& </FONT> after
your text. IMPORTANT here is to spell COLOR without the U (
Even if you are English ! ) AND the ONLY space in that command
is between the words FONT & COLOR.
There are a large number of colours
available, RED, BLUE, YELLOW, GREEN etc etc but you can also use
"DARKBLUE" or "LIGHTBLUE" etc etc
just try it !
**************************************************************************************
- You want to make your text
Bigger
?
put <FONT
SIZE="+3"> before your text &
</FONT> after your
text.
You can use other sizes +1 , +2, +3 etc
etc.
**************************************************************************************
You want to center the text in the
middle of the screen ?
use ....
<CENTER> before your
text & </CENTER>
after your text.
**************************************************************************************
You may combine any /all of the
previous commands....
I offer this only as an example ... I
don't suggest you try this in your first post !!
so ....
<CENTER><B>I have<S>too
many</S> <U>NOT ENOUGH</U> <FONT
COLOR="RED" SIZE="+3"> Omegas
</FONT></B></CENTER>
will appear as
I have too many NOT ENOUGH
Omegas
**************************************************************************************
That's the end of the 1st
Tutorial.
Steve Waddington
December 15, 2005
Lesson Two -- Posting
Photos
Hi Guys,
presented here is the second of my
"tutorials" on how to use HTML in your posts on the Zowie Omega
Forum.
This tutorial will cover how to post
pictures, multiple pictures, change the sizes, postioning &
borders around them.
**************************************************************************************
So, lets start with some
basics. SIZE.
Most people nowadays surf with a highspeed internet connection.
BUT, it is still common decency to make your pictures a reasonable
size. Some people still surf with modems, a webpage overloaded with
graphics or a single large graphic is not fun for these guys.
As a rule of thumb. I try not to make my pics more than 70KB in
size.
The example pic for this page
is 56KB.
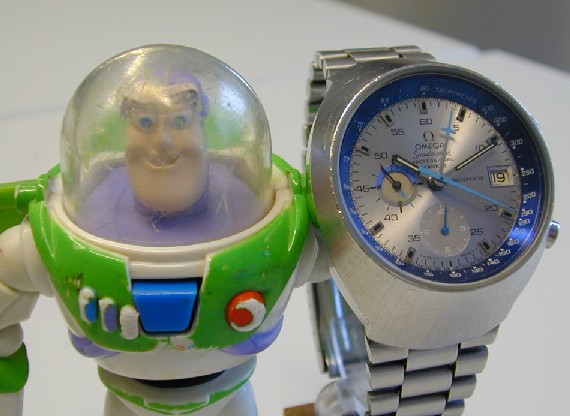
How did I do that ? Here's
the basic command.
<IMG
SRC="http://www.old-omegas.com/zowie/buzz.jpg">
& that's it.
What does that mean ? Well,
there is basically two parts.
1, the command show a
picture
2, which picture
The command starts with this
<IMG SRC="
and ends with this ">
The picture is this bit
http://www.old-omegas.com/zowie/buzz.jpg
The basic command is very
simple. You just use it like that, there should NOT be any spaces
between the quote symbols
The picture needs to be
hosted somewhere on the internet. ie the name should start with
http://www....
If you can see a picture, (
eg in eBay ) that you'd like to post in the forum,
right-click on the picture,
go down to the properties option,
click on it & you'll see the name that starts with something like
http://www.
I should mention copyright
here. I don't think eBay has a problem with people/forums using their
pics, for educational purposes, but some other site owners DO have
problems with this.
If the seller doesn't state
his copyright, it's permissable to use the photo's for educational
use.
It's always worth asking a
site owner FIRST, BEFORE you use their pictures.
**************************************************************************************
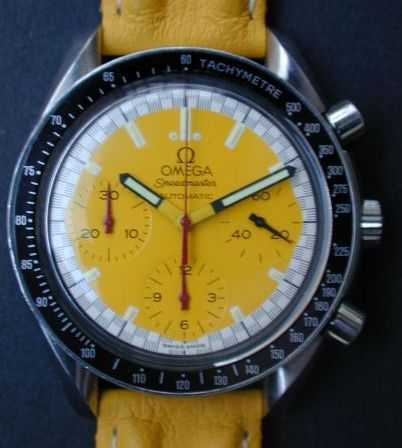
You want to post 2 pics ?
just repeat the command & put a different picture in the 2nd
command
Here's the command
<IMG SRC="http://www.old-omegas.com/zowie/buzz.jpg">
<IMG
SRC="http://www.old-omegas.com/pics/schuey/yelldial.jpg">
This looks like
You can put blank lines or
text between the pics
You can combine this with the
<CENTER>
command to centralize the pics.
<CENTER>
<IMG
SRC="http://www.old-omegas.com/zowie/buzz.jpg">
There is some text between the pics
<IMG
SRC="http://www.old-omegas.com/pics/schuey/yelldial.jpg">
</CENTER>
Does this
There is some text between the pics
**************************************************************************************
Want to put a border around
the pic ? then the command looks like this
<IMG SRC="http://www.old-omegas.com/zowie/buzz.jpg"
BORDER=10>
You can change the
"thickness" of the border by using a number other than 10. Keith
Downing uses this to great effect in most of his picture
posts.
**************************************************************************************
It is possible to modify the
DISPLAYED size of a picture.
Believe it or not, the
picture below is exactly the same as above, I just made it
APPEAR smaller
<IMG SRC="http://www.old-omegas.com/zowie/buzz.jpg"
BORDER=10 WIDTH=100>
Compare the last 2 pics. The
ONLY difference is the addition of the WIDTH=100
part in the HTML
command.
IMHO, I have ruined the
picture now, so use this extension with care.
You should also know that
this addition, ONLY reduces the displayed size of the picture. it is
still 56KB in size.
**************************************************************************************
Lastly, please excuse my
pics. I am not a good photographer :-(
That's the end of the 2nd
Tutorial.
If you'd like me to try to
explain how to do something with HTML, either post here or send me an
E-mail.
All the Best
Steve Waddington
March 1, 2006
|